Publishing PLSQL packages as Web Services Aug 16, 2010
If you have PLSQL packages that you want to expose as Web Services, a few steps using Jdeveloper will help
Let us assume that we have the following package
CREATE OR REPLACE PACKAGE AMMAR_WEBSERVICE IS
FUNCTION UPD_SALARY (p_EMPNO NUMBER, p_SAL_INC NUMBER) RETURN NUMBER ;
END;
CREATE OR REPLACE PACKAGE body AMMAR_WEBSERVICE IS
FUNCTION UPD_SALARY (p_EMPNO NUMBER, P_SAL_INC NUMBER) Return NUMBER IS
CURSOR C1 IS SELECT SAL FROM EMP WHERE EMPNO=P_EMPNO;
REC C1%ROWTYPE;
NEW_SAL NUMBER;
BEGIN
OPEN C1;
FETCH C1 INTO REC;
NEW_SAL := rec.sal + p_sal_inc;
update emp set sal = new_sal
where empno = p_empno;
return (new_Sal);
commit;
end;
end;
This package increases that salary of an employee and returns the new employee
As seen above, it requires two parameters, the empno to identify the employee whose salary will be increased and the
I will demonsrate how to publish it as a web service on a standalone OC4J component
You will need Jdeveloper ( I am using jdeveloper 10g 10.1.3), which contains a standalone OC4J server
1) Run the Standalone OC4J instance
a. In Jdeveloper Home Directory , find switch to the Jdev/bin directory
b. Run oc4jstart.bat batch file
c. It will open a dos screen (black screen) and in a while will ask you for a password. Choose a password of your own (I use manager1)
d. Keep the black screen open in order to keep the OC4J running
2) In Jdeveloper, you need to create TWO connections from the Connections Tab,
a. One connection to the Database Schema where your PLSQL packages are stored
b. The other connection to the Oracle OC4J stand alone container as shown below
Note: this document does not explain how to create connections
3) From the Jdeveloper Application Navigator Create a new application and call it PALCO_WS

4) After you press OK, a new window will appear and there, you can provide a project name. I called the project upd_sal
5) Switch to the Connections Tab and navigate to the connection that you created just now.
6) Expand to the Packages node and find the PLSQL package called AMMAR_WEBSERVICE and right click on it as shown below

7) Invoke the Publish as Web Service menu option
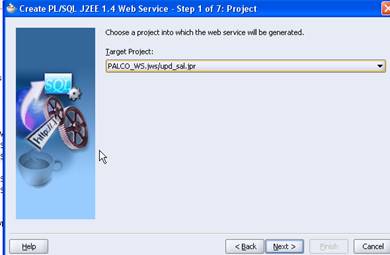
8) When asked about the project where the web services file will be generated choose the project we have just created, Namely , Upd_sal in the PACLO_WS package as shown below
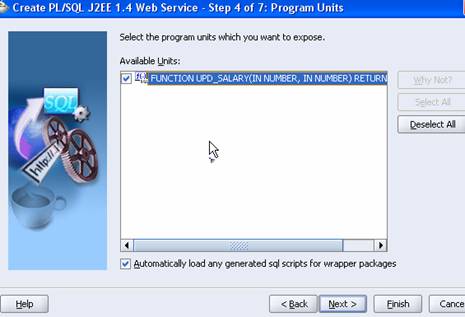
9) Proceed with the wizard by pressing next until you get to Step 4, where you need to select the name of the Function (part of the PLSQL Package) that you want to expose as web service as shown below
10) Press Finish and you are done, The web service files are generated in your project
11) In order to you the Web Service , you need to deploy it on the OC4J server. You need not worry about the deployment profile, because the wizard had already done it for you, and in fact you can examine the deployment profile in addition to the other files in the Application Navigator as shown below
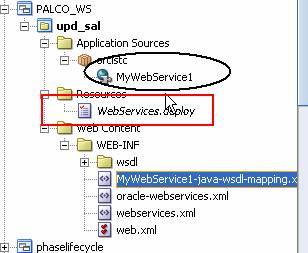
12) Also please examine the WSDL file because it indicates the Web Service End point (its address). The WebService WSDL file information is related to the MyWebService1 object encircled in Black above.
13) Examine the Source of this object and inspect soap:address tag shown below
<definitions>
…
<service name="MyWebService1">
<port name="MyWebService1SoapHttpPort" binding="tns:MyWebService1SoapHttp">
<soap:address location="http://192.168.0.8:8888/PALCO_WS-upd_sal-context-root/MyWebService1SoapHttpPort"/>
</port>
</service>
</definitions>
14) Deploy the web services by using right clicking the WebServices.deploy node as shown below
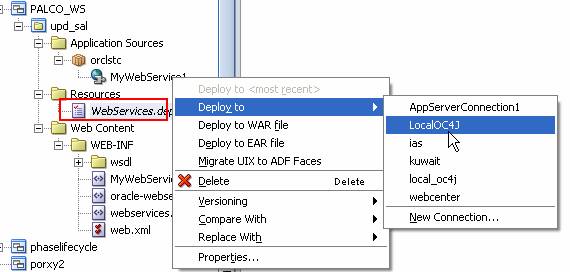
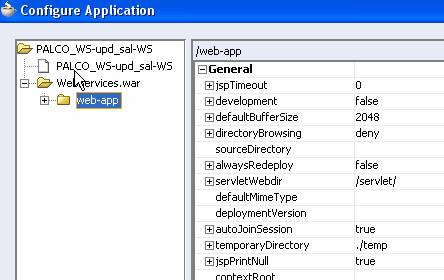
15) Continue the deployment by selecting the War file (note make sure that the OC4J stand alone instance in running)
16) This should complete the deployment of AMMAR_WEBSERVICE PLSQL
17) To test the delployment, copy the Location URL from the WSDL file (In BOLD in step 13) and launch a new browser. Copy the URL to the address bar of the browser as shown below

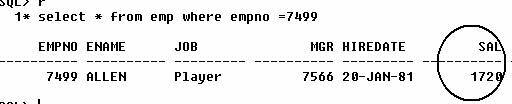
18) Once the URL is invoked, you will get an HTML page that allows you to pass 2 parameters to the Web Service which I filled with empno=7499 and salary increase of 120 as shown below
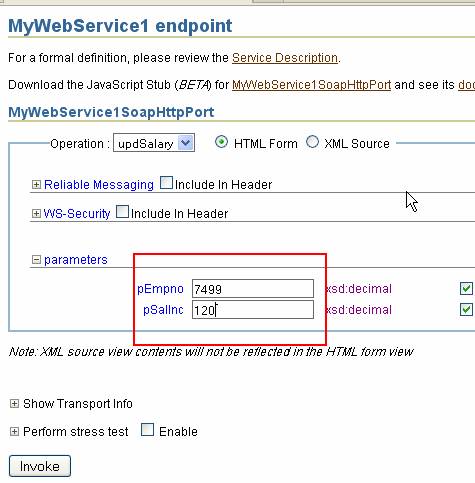
19) Press Invoke
20) The result of the invocation will be displayed in a Test Result page, it is better to view the result in the Formatted XML view rather than the default Raw XML. You can launch the Formatted XML view by clicking the Link as shown below by the pointer
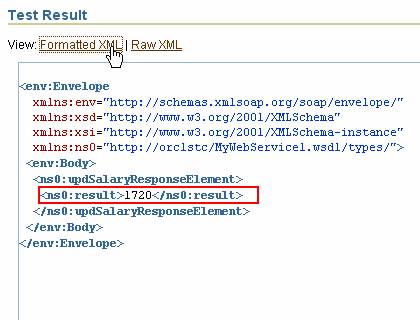
21) The Result shows that the return value of the webservices is 1720 which is the new salary of the employee after the increase. We can double check with the value in the database which indeed confirms the result as shown below